Key Takeaways
- Intersection design is the process of shaping the place where roads, streets, driveways, sidewalks, bike routes, and transit movements meet.
- A strong design balances safety, capacity, queue storage, sight distance, accessibility, turning paths, and constructability.
- The design process starts with context and data, then moves into control selection, geometry, operations, multimodal design, safety checks, and final deliverables.
- The best intersection is not always the widest or most signalized option; it is the option that makes conflicts predictable, speeds appropriate, and user decisions simple.
Table of Contents
Featured diagram
Introduction
Intersection design is one of the most important parts of transportation engineering because intersections concentrate many movements into a small area. Drivers go straight, turn left, turn right, merge, stop, yield, accelerate, and change lanes. Pedestrians cross traffic. Bicyclists may continue through, merge with vehicles, use a bike crossing, or wait for a signal. Buses, freight vehicles, emergency vehicles, and driveway traffic may all interact at the same location.
A good intersection design does more than fit pavement inside right-of-way. It creates a clear, predictable, and accessible place where users understand where to go, who has priority, and how conflicts are controlled. This guide walks through the complete process: intersection types, data collection, control selection, geometric layout, sight distance, turn lanes, pedestrian and bicycle design, signal basics, safety countermeasures, and final plan deliverables.
This content is for informational purposes only; review the Turn2Engineering Terms and Conditions for details.
What is Intersection Design?
Intersection design is the engineering process of planning and arranging the place where two or more transportation paths meet. It includes roadway geometry, intersection control, turn lanes, sight distance, signing, pavement markings, pedestrian crossings, bicycle facilities, ADA curb ramps, lighting, drainage, utility coordination, and access management.
In simple terms, intersection design answers a practical question: How should this conflict area be shaped and controlled so users can move safely, efficiently, and predictably? The answer depends on traffic volumes, speeds, crash history, land use, design vehicle needs, pedestrian activity, bicycle routes, transit service, available right-of-way, and future growth.
Intersection design is the process of arranging geometry, traffic control, sight distance, turning movements, pedestrian crossings, bicycle accommodations, and safety treatments where roads or paths meet so all users can move through the conflict area safely and efficiently.
For students, intersection design is where roadway design, traffic engineering, operations, safety, accessibility, and construction details come together. For practicing engineers, it is often where small design decisions have large effects: a curb radius can change pedestrian crossing distance, a stop bar location can affect truck turns, and a short left-turn bay can cause queues to spill into through lanes.
Why Intersection Design Matters
Intersections are critical because they create conflict points. On a basic roadway segment, most vehicles travel in the same direction. At an intersection, users cross, merge, diverge, stop, turn, and accelerate in different directions. The designer must manage those conflicts with geometry and control.
Good intersection design improves safety
Safety is usually the most important reason to improve an intersection. Common safety problems include left-turn angle crashes, rear-end crashes, pedestrian conflicts, high-speed right turns, poor sight distance, confusing lane assignments, and inadequate lighting. Design treatments should match the actual crash pattern or risk factor rather than simply adding more pavement.
Good intersection design improves operations
Intersections often control corridor performance. Even if a roadway has enough through lanes, a poorly designed intersection can create delay, long queues, blocked driveways, missed signal progression, and spillback into nearby intersections. Operational design checks usually focus on lane groups, capacity, delay, queue storage, and how well the design handles the design-year peak period.
Good intersection design improves user comfort
The intersection should be understandable at a glance. Drivers should know which lane to use and where to stop. Pedestrians should see clear crossings and accessible ramps. Bicyclists should have an obvious path through or around the conflict area. A design that technically “works” but feels confusing usually performs poorly in the real world.
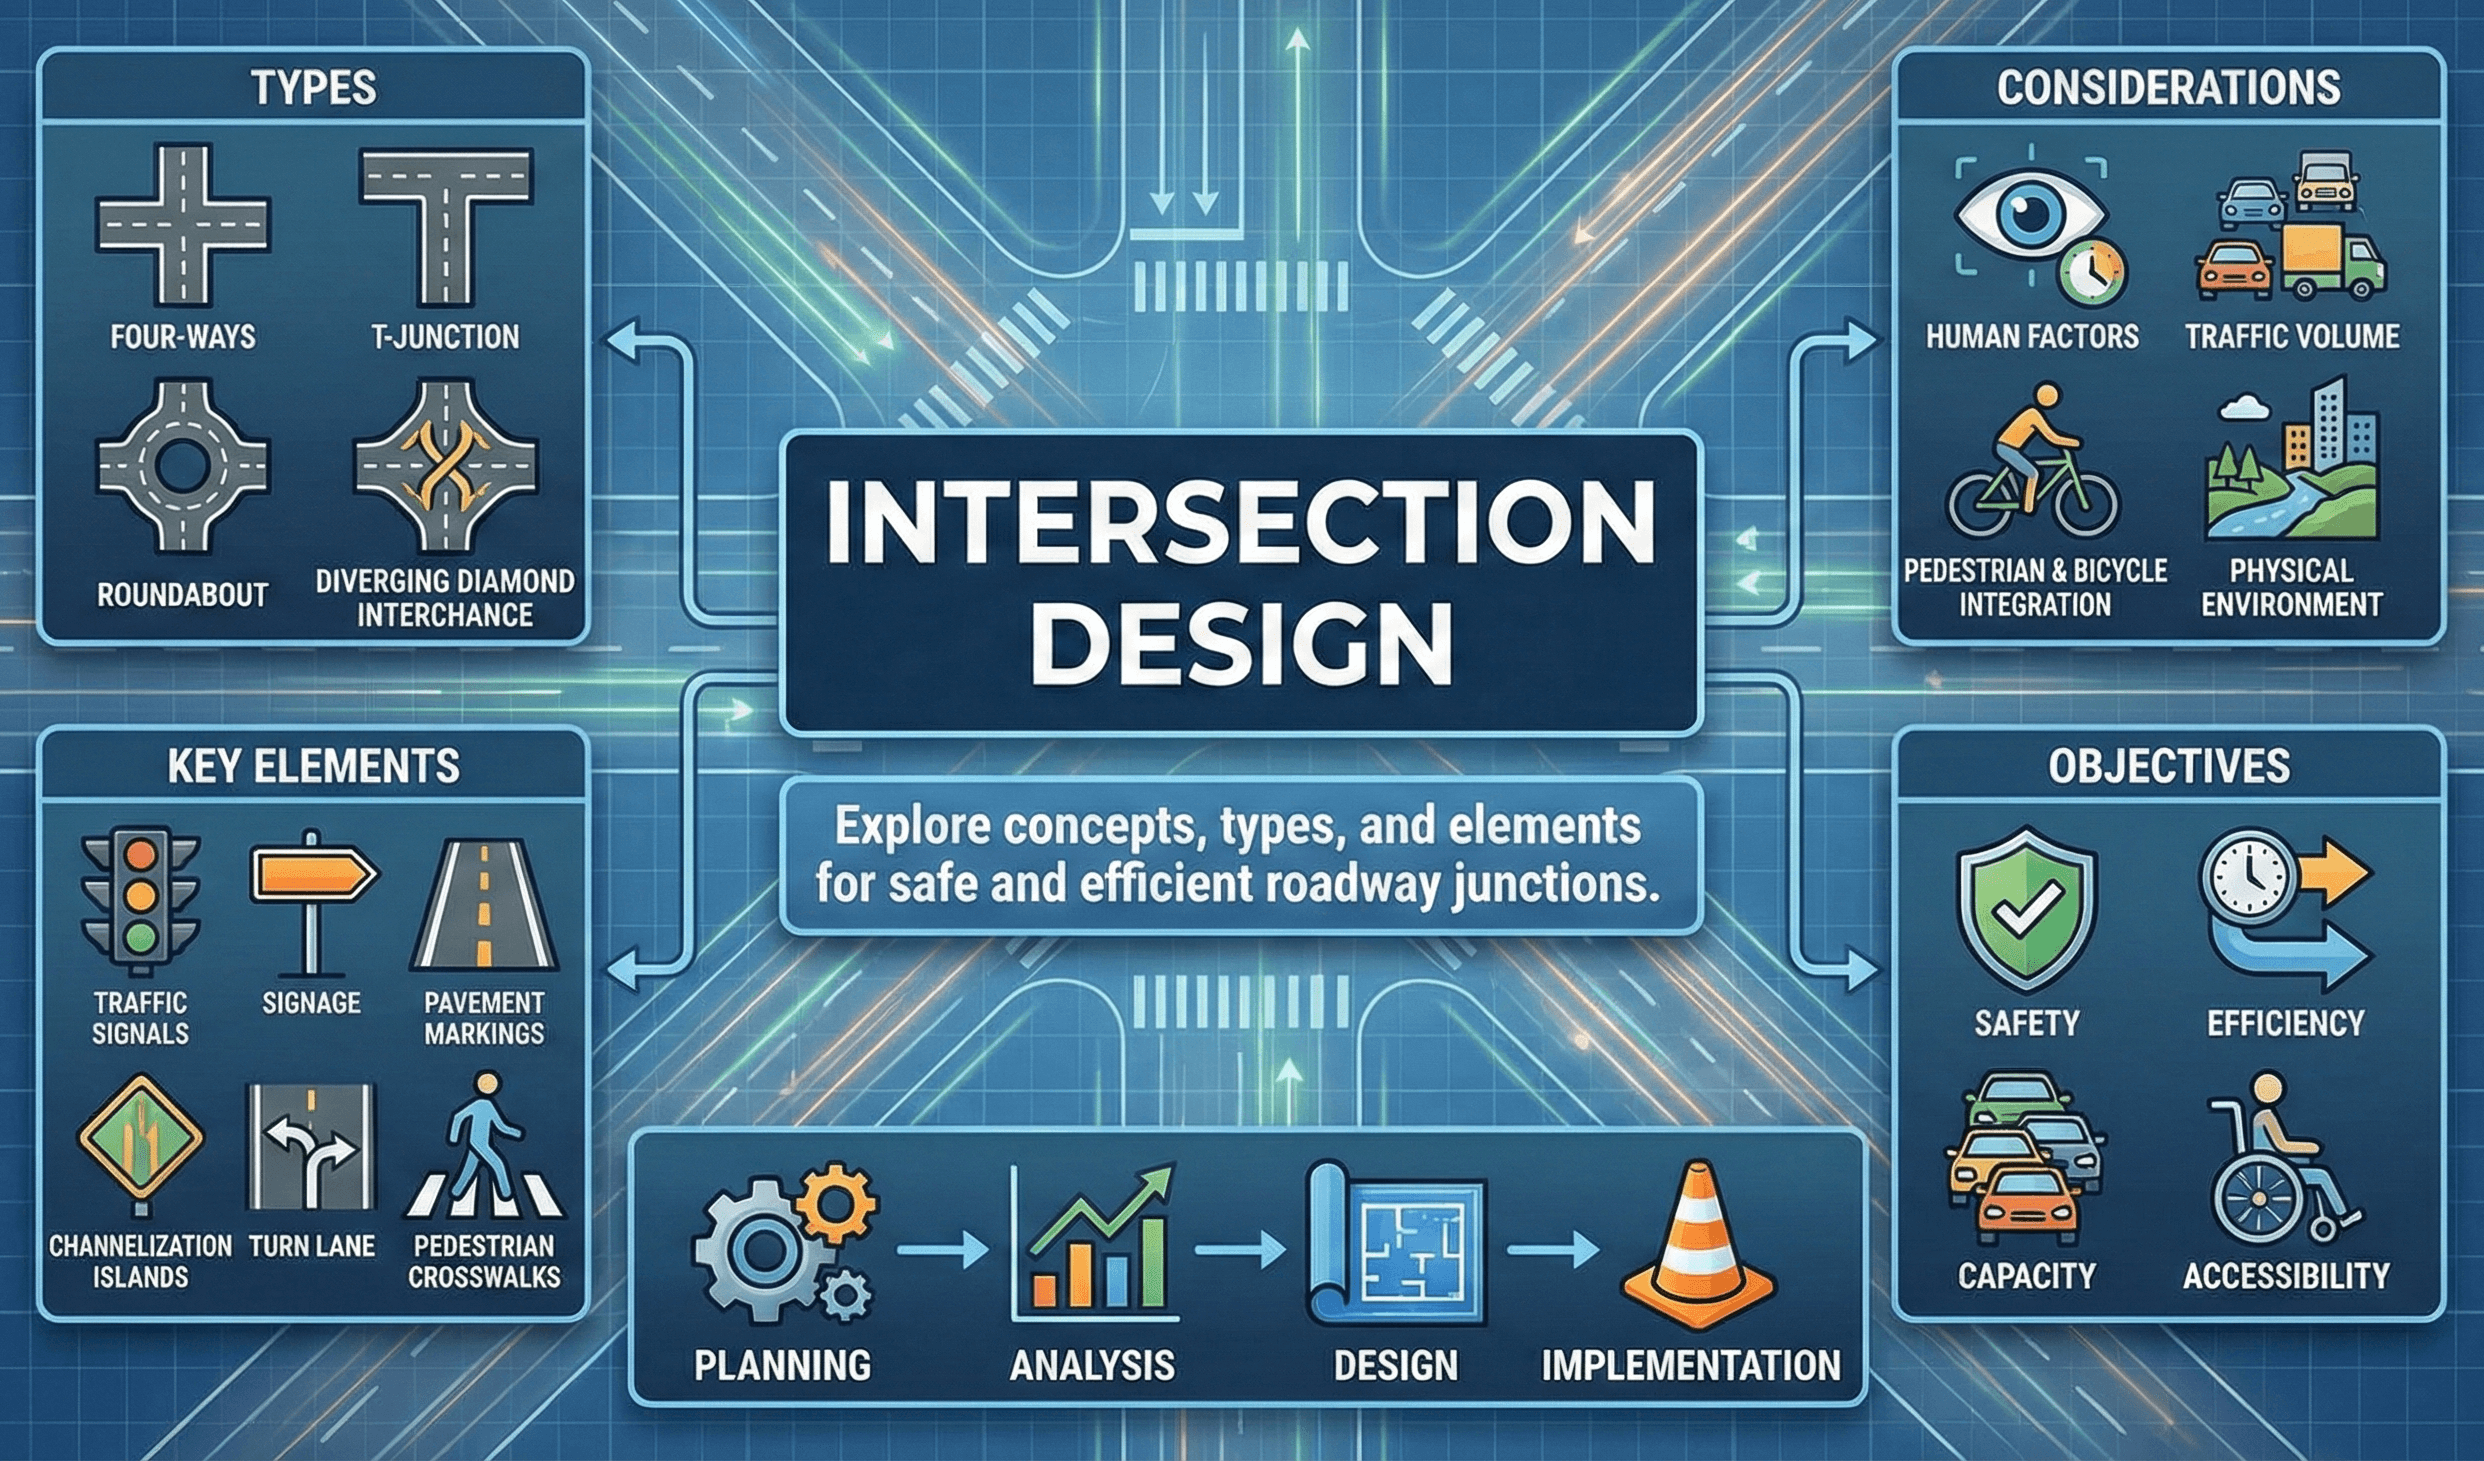
Types of Intersections
The right intersection type depends on context, traffic demand, speeds, safety history, available right-of-way, nearby access points, and the users being served. Most designs fall into one of the following categories.
Uncontrolled intersections
Uncontrolled intersections have no stop, yield, or signal control. They are usually limited to very low-volume, low-speed local streets or private access conditions. The main design concerns are visibility, approach speed, and clear user expectations.
Two-way stop-controlled intersections
Two-way stop control is common where a lower-volume minor street meets a higher-volume major street. The minor street stops while the major street continues. Designers must check minor-street delay, gap availability, sight distance, and whether turning vehicles on the major road need dedicated turn lanes.
All-way stop-controlled intersections
All-way stop control requires every approach to stop. It can work well in low-speed grids or locations with balanced volumes, but it may create unnecessary delay where one approach is much busier than the others. Designers should also consider pedestrian activity, crash history, and whether users are likely to comply.
Signalized intersections
Signalized intersections assign right-of-way over time using signal phases, green intervals, yellow intervals, all-red clearance, pedestrian intervals, and detection. Signals can serve heavy traffic demand, complex multimodal needs, and coordinated corridors, but they also introduce delay, queue storage needs, equipment costs, and maintenance requirements.
Roundabouts
Roundabouts use yield control and circular geometry to reduce high-speed crossing conflicts. The central island, splitter islands, and entry deflection are designed to slow approaching vehicles and create predictable, lower-speed movements. A roundabout is not simply a traffic circle; it is a speed-management and conflict-management design.
Alternative intersections
Alternative intersections reduce or relocate difficult conflicts, especially left-turn and crossing conflicts. Examples include restricted crossing U-turns, median U-turns, displaced left-turn intersections, jughandles, quadrant roadways, and other designs that separate movements in space or time.
| Intersection Type | Best Used When | Main Design Watchout |
|---|---|---|
| Two-way stop control | Minor street demand is low and major street progression matters | Minor-street delay, sight distance, and gap availability |
| All-way stop control | Low-speed approaches have balanced volumes or crash patterns support it | Unnecessary delay if volumes are unbalanced |
| Signalized intersection | Demand, pedestrian needs, or coordination require assigned right-of-way | Queue storage, signal timing, detection, and maintenance |
| Roundabout | Speed reduction and severe crash reduction are major goals | Fastest path speed, truck paths, pedestrians, and bicyclists |
| Alternative intersection | Left-turn or crossing conflicts dominate safety/operations problems | User comprehension, signing, access, and downstream U-turn capacity |
Intersection Design Process
A reliable intersection design process prevents late-stage redesign. Instead of starting with lane lines, begin with the purpose of the intersection, the users it serves, and the constraints that control what can be built.
Step 1: Define the project context
Identify whether the intersection is urban, suburban, rural, commercial, residential, school-related, industrial, or part of a major arterial corridor. Context affects speed targets, pedestrian priority, bicycle treatments, driveway management, lane widths, curb radii, and signal needs.
Step 2: Collect traffic and site data
Gather turning movement counts, pedestrian counts, bicycle counts, heavy vehicle percentages, speed data, crash history, existing signal timing, queue observations, transit routes, right-of-way limits, utility locations, drainage features, and vertical grading constraints.
Step 3: Identify the design vehicle
The design vehicle is the largest vehicle that must regularly use the intersection. A neighborhood intersection may be designed around passenger cars and occasional fire apparatus, while an industrial corridor may require WB truck turning templates. Choosing the wrong design vehicle can create either an intersection that trucks cannot use or an oversized intersection that encourages high-speed turning.
Step 4: Select feasible control options
Compare stop control, signalization, roundabout control, movement restrictions, and alternative intersection forms. The first screening should eliminate options that do not fit the right-of-way, grading, access, drainage, utility, or user-context constraints.
Step 5: Develop the geometric layout
Lay out the approach lanes, turn lanes, curb returns, medians, islands, crosswalks, ramps, stop bars, bicycle treatments, and drainage features. Geometry should reinforce the desired speed and movement behavior.
Step 6: Check operations
Evaluate whether the design handles current and future demand. Check capacity, delay, volume-to-capacity ratio, queue length, turn bay storage, and whether queues block driveways or nearby intersections.
Step 7: Check safety and accessibility
Review sight distance, conflict points, pedestrian exposure, bicycle conflicts, high-speed turns, lighting, ADA paths, signal visibility, and lane assignment clarity. The design should be safe and understandable for a first-time user.
Step 8: Prepare plans and design documentation
Final deliverables usually include layout sheets, profiles, grading details, ADA ramp details, signing and pavement marking plans, signal plans if applicable, traffic control/staging plans, and a short design narrative explaining major decisions.
Before detailed drafting, confirm you know the controlling movement, controlling vehicle, controlling user, controlling constraint, and controlling safety issue. Those five controls should shape the design.
Project Inputs You Need Before Drawing Lanes
Intersection design is data-driven. If the inputs are incomplete, the layout is likely to change repeatedly during review. A strong starting package should include field conditions, traffic demand, safety history, and physical constraints.
Base mapping and existing conditions
Start with an accurate base map showing pavement edges, curb lines, sidewalks, driveways, lanes, medians, islands, drainage structures, utility poles, signal equipment, cabinets, trees, walls, fences, property lines, and right-of-way limits.
Turning movement counts
Turning movement counts show how many vehicles turn left, go through, and turn right during key periods. Many intersection decisions depend on these counts, including lane configuration, signal phasing, turn bay length, and whether minor-street stop control remains reasonable.
Pedestrian and bicycle activity
Even if pedestrian or bicycle volumes are low, the design still needs accessible routes, safe crossing locations, and logical continuity. If the intersection is near a school, transit stop, park, trail, campus, downtown area, or commercial district, multimodal design becomes a primary control.
Crash history
Crash history helps identify whether the problem is operational, geometric, behavioral, or visibility-related. A cluster of rear-end crashes may point to queueing and speed issues. Left-turn angle crashes may point to signal phasing, sight distance, or left-turn conflicts. Pedestrian crashes may point to crossing distance, visibility, lighting, or turning-speed problems.
Right-of-way, utilities, and drainage
Right-of-way and utility constraints often determine what can actually be built. Drainage is especially important because curb ramps, crosswalks, gutter flow, inlet placement, and low points must work together.
Selecting Intersection Control
Intersection control determines how users assign right-of-way. The right control type should be selected based on context, demand, safety, operations, user expectations, and feasibility.
Questions to ask before choosing control
- Are the approach speeds low, moderate, or high?
- Are traffic volumes balanced or heavily skewed toward one road?
- Are left-turn or crossing conflicts causing crashes?
- Are pedestrian crossings frequent or difficult?
- Is there enough right-of-way for a roundabout or turn lanes?
- Will queues spill back into upstream intersections, ramps, driveways, or rail crossings?
- Can users clearly understand the control type?
- Will the agency be able to maintain the equipment and markings?
Stop control
Stop control can be appropriate for lower-volume intersections, but designers must check sight distance, minor-street delay, and whether major-street turning vehicles need storage. All-way stop control may be useful in some low-speed environments, but it can create unnecessary delay when volumes are not balanced.
Signal control
Signals can assign right-of-way to high-volume, high-conflict, or multimodal intersections. However, signalization is not automatically safer or better. Signals require timing, detection, maintenance, clearance intervals, pedestrian intervals, and queue storage. Poorly designed signals can increase rear-end crashes and delay.
Roundabout control
Roundabouts use geometry to reduce speeds and convert many crossing conflicts into merging and diverging conflicts. They can be effective when designed correctly, but they require careful attention to entry deflection, truck aprons, pedestrian crossings, bicycle accommodation, and sight lines.
Movement restrictions and alternative designs
When a direct left turn or crossing movement creates unacceptable conflict, designers may consider restricted movements, median U-turns, restricted crossing U-turns, displaced left turns, or other alternative forms. These designs should be supported by clear signing, pavement markings, and driver expectancy.
Choosing a signal only because an intersection is congested can miss the real problem. Sometimes the better solution is access management, turn lane storage, protected left-turn phasing, a roundabout, or a reduced-conflict design.
Geometric Layout: Lanes, Alignment, Curb Radii, and Turning Paths
Geometry determines how users physically move through the intersection. Good geometry supports safe speeds, clear decisions, smooth turning paths, predictable lane use, accessible crossings, and buildable drainage.
Approach alignment
Intersection approaches should be easy to understand. Near-90-degree intersections typically provide better visibility and simpler crossing movements than highly skewed intersections. Skew can lengthen pedestrian crossings, complicate signal head placement, and create awkward turning paths.
Lane configuration
Lane configuration includes through lanes, left-turn lanes, right-turn lanes, shared lanes, receiving lanes, bike lanes, bus lanes, and auxiliary lanes. Lane assignment should match user expectations and downstream receiving capacity.
Design vehicle and turning templates
Turning templates confirm whether the design vehicle can make the intended movements. Designers should check inside tracking, outside swept path, lane encroachment, stop bar placement, median noses, signal poles, pedestrian refuge islands, and curb returns.
Curb return radius
Curb radius affects both vehicle turning ability and pedestrian safety. Larger radii help large vehicles turn with less encroachment but can increase passenger-car turning speeds and pedestrian crossing distance. Smaller radii slow turns and shorten crossings but may require mountable aprons, truck encroachment, or stop bar adjustments.
Medians and islands
Medians and islands can separate movements, guide turning paths, provide pedestrian refuge, restrict unsafe turns, and improve access management. They should be large enough to be visible and functional, not just painted leftover space.
Avoid defaulting to oversized radii. Right-size the corner using the design vehicle, actual turn frequency, pedestrian exposure, and desired turning speed.
Sight Distance in Intersection Design
Sight distance is one of the most important intersection design checks. Users need enough visibility to see conflicts, make decisions, and react safely. Sight distance can be affected by horizontal curves, vertical grades, landscaping, walls, parked vehicles, signs, buildings, bridge rails, utility poles, and queues.
Stopping sight distance
Stopping sight distance is the distance a driver needs to perceive a hazard and stop before reaching it. It depends on speed, perception-reaction time, braking distance, roadway grade, and surface conditions.
- \(SSD\) Stopping sight distance
- \(v\) Vehicle speed
- \(t\) Perception-reaction time
- \(a\) Deceleration rate
Intersection sight distance
Intersection sight distance evaluates whether a driver at a minor-road approach, driveway, or stop-controlled movement can see enough of the major road to safely enter, cross, or turn. This is especially important at two-way stop-controlled intersections, driveways near intersections, and rural high-speed crossings.
Sight triangles
A sight triangle is the clear area needed near an intersection so approaching users can see each other. Obstructions inside the sight triangle may include vegetation, fences, monuments, parked cars, signs, utility cabinets, walls, or grading features.
Sight distance should not only be checked on a plan. Field-review the intersection from driver eye height and pedestrian eye level, especially where slopes, vegetation, parked cars, or roadside objects may block visibility.
Turn Lanes, Storage Length, and Queue Spillback
Turn lanes separate slower or stopped turning vehicles from through traffic. They can improve operations and reduce certain crash types, but they must be long enough and integrated with pedestrian, bicycle, driveway, and signal needs.
Left-turn lanes
Left-turn lanes are often used where left-turning vehicles would otherwise block through traffic or create rear-end crash risk. The designer must check taper length, deceleration length, storage length, queue length, sight distance, and whether the left-turn lane has positive offset for better visibility.
Right-turn lanes
Right-turn lanes can reduce delay for through vehicles, but they may create additional pedestrian and bicycle conflict points. Channelized right-turn lanes should be carefully evaluated because high-speed slip lanes can increase crossing difficulty.
Storage length
Storage length is the portion of a turn lane that holds queued vehicles. If storage is too short, queues can spill into the through lane, block driveways, interfere with upstream intersections, or prevent vehicles from reaching the turn lane.
Peak 15-minute checks
Hourly volumes can hide short-term surges. Schools, event venues, shopping centers, freeway ramps, stadiums, churches, and industrial shift changes may create short peak periods that control turn bay storage.
A design can pass a basic capacity check but still fail because queues do not fit. Always compare predicted queues against available physical storage.
Pedestrian, Bicycle, Transit, and ADA Design
Modern intersection design must work for more than vehicles. Pedestrians, bicyclists, transit riders, freight vehicles, emergency vehicles, older adults, and people with disabilities all interact at intersections.
Pedestrian crossings
Crosswalks should be placed where people naturally want to cross and where drivers can see them. Long crossings increase pedestrian exposure. Large curb radii, skewed geometry, slip lanes, and wide approaches can make crossings longer and more stressful.
Curb ramps and accessible routes
ADA design is not just adding a ramp. The accessible route should connect sidewalk to ramp, ramp to crosswalk, crosswalk to refuge if present, and refuge to the opposite ramp. Designers must also coordinate ramp slopes, cross slopes, landings, detectable warnings, drainage, and pushbutton placement.
Pedestrian refuge islands
Refuge islands allow pedestrians to cross one direction of traffic at a time. They are especially useful on wide streets, multilane roads, higher-speed approaches, and locations where pedestrian crossing time or comfort is a concern.
Bicycle movements
Bicycle design depends on the corridor facility type. Treatments may include bike boxes, green conflict markings, protected intersection corners, two-stage turn queue boxes, bicycle signal phases, or clear shared-lane transitions. The main goal is to make bicycle movements visible and predictable.
Transit and freight
Transit design may require bus stop placement, queue jumps, bus bulbs, transit signal priority, and pedestrian access to stops. Freight design requires turning templates, curb return checks, median nose clearance, stop bar setbacks, and vertical clearance where applicable.
Trace each user path separately: driver path, pedestrian path, bicycle path, bus path, truck path, emergency vehicle path, and maintenance path. Intersections fail when one of these paths is assumed instead of checked.
Operations: Capacity, Delay, and Queue Storage
Operational analysis helps determine whether the design can serve expected demand. It supports lane configuration, turn bay length, signal phasing, cycle length, and whether queues will fit.
Lane group concepts
Intersection movements are often analyzed by lane groups, such as northbound left, eastbound through, or westbound shared through-right. Lane groups help estimate capacity, delay, and queueing for movements with similar control and lane use.
A simple capacity relationship for a signalized movement
A common way to understand signalized capacity is to relate saturation flow to the share of green time available to the movement:
- \(c\) Movement or lane group capacity
- \(s\) Saturation flow rate
- \(g\) Effective green time
- \(C\) Cycle length
This simplified relationship shows why capacity changes when green time, cycle length, saturation flow, or lane configuration changes. Real design analysis includes additional adjustments, but the basic idea is useful for understanding why a movement becomes oversaturated.
Delay and level of service
Delay measures how long users wait compared with free-flow movement. Level of service is a common way to communicate operational quality, but it should not be the only design goal. A design that improves vehicle delay while worsening pedestrian safety may not be the best solution.
Queue spillback
Queue spillback occurs when queued vehicles extend beyond available storage. This can block driveways, upstream intersections, railroad crossings, bus stops, or adjacent through lanes. Queue checks are essential for both signalized and unsignalized designs.
Signalized Intersection Design Basics
Signalized intersection design combines geometry, equipment placement, signal phasing, timing, detection, pedestrian intervals, and safety checks. Geometry and signal operation should be developed together, not separately.
Signal phasing
Phasing determines which movements receive right-of-way together. Common decisions include whether left turns are permissive, protected, protected-permissive, or split-phased. Pedestrian phases, bicycle phases, transit priority, and emergency preemption may also affect timing.
Cycle length and green splits
Cycle length is the time required to serve the complete sequence of signal phases. Green splits allocate time to competing movements. Longer cycles can increase capacity for some movements but may increase pedestrian delay and queue length.
Yellow and all-red intervals
Clearance intervals help transition from one movement to the next. Poor clearance timing can contribute to red-light running, abrupt braking, or angle conflicts.
Pedestrian intervals
Pedestrian signal timing should reflect crossing distance, walking speed assumptions, buffer intervals, and accessibility requirements. The geometric plan and signal plan must agree on the actual crosswalk length.
Detection and equipment placement
Vehicle detection, bicycle detection, pedestrian pushbuttons, signal heads, poles, mast arms, cabinets, and conduit must all fit within the design. Stop bar placement affects detection, crosswalks, turning templates, and signal visibility.
Designing the curb and lane geometry first, then trying to “fit the signal later,” can create pole conflicts, poor detection zones, stop bar issues, and crosswalk changes late in design.
Work with real numbers
Engineering calculators & equation hub
Jump from theory to practice with interactive calculators and equation summaries covering civil, mechanical, electrical, and transportation topics.
Roundabout Design Considerations
Roundabouts are often used to reduce severe conflicts and manage speed. Their safety benefit comes from geometry: entering vehicles slow down, yield, and move around the central island in one direction.
Entry deflection
Entry deflection forces approaching vehicles to slow before entering. If an approach is too straight, drivers may enter too fast, reducing the safety value of the roundabout.
Inscribed circle and central island
The inscribed circle diameter and central island shape affect vehicle paths, entry speed, truck accommodation, and available pedestrian refuge space.
Truck apron
A truck apron is a mountable area around the central island that allows large vehicles to track through the roundabout while keeping passenger-vehicle paths tighter and slower.
Pedestrian and bicycle crossings
Roundabout crosswalks are typically set back from the yield line so pedestrians cross where vehicle speeds are lower and driver decisions are simpler. Bicycle accommodation depends on traffic speed, volume, user comfort, and whether the corridor uses separated bicycle facilities.
The most important roundabout design check is not whether vehicles can enter; it is whether the fastest reasonable path through the roundabout is slow enough for the intended safety performance.
Intersection Safety Countermeasures
Safety countermeasures should be selected based on the problem they are solving. A treatment that helps one crash type may not solve another. The table below connects common intersection problems with design responses.
| Problem | Possible Design Response | Why It Helps |
|---|---|---|
| Left-turn angle crashes | Protected left-turn phase, positive offset left-turn lanes, left-turn restriction, roundabout, or reduced-conflict design | Reduces or separates the most severe crossing conflicts |
| Rear-end crashes | Dedicated turn lanes, better signal timing, advance warning, access management, or queue storage improvements | Reduces sudden stopping and blocked through lanes |
| Long pedestrian crossing | Curb extensions, refuge islands, lane reduction, tighter curb radii, or signal timing changes | Reduces exposure time and improves crossing comfort |
| High-speed right turns | Smaller curb radius, raised crossing, tighter channelization, or removal/redesign of slip lane | Controls turning speed and improves yielding behavior |
| Poor visibility | Clear sight triangles, move obstructions, adjust stop bars, improve lighting, or realign approaches | Improves user detection and decision time |
| Confusing lane use | Lane assignment signs, pavement arrows, guide markings, channelization, or simplified lane geometry | Improves predictability and reduces last-second maneuvers |
| Queue spillback | Longer storage, signal timing changes, access management, turn restrictions, or added lane capacity | Keeps queues from blocking other movements |
Crash pattern matters
A safety review should look for crash patterns rather than treating all crashes equally. Rear-end crashes, angle crashes, left-turn crashes, pedestrian crashes, bicycle crashes, nighttime crashes, and wet-weather crashes often point to different solutions.
Speed management matters
Lower conflict speeds reduce crash severity and give users more time to react. Designers can manage speed with lane width, curb radius, deflection, raised crossings, medians, signs, markings, and visual cues.
Lighting and visibility matter
Lighting improves the ability to see pedestrians, bicyclists, lane lines, medians, signals, signs, and roadside objects at night. Poor nighttime visibility can undermine an otherwise sound geometric layout.
Access Management Near Intersections
Driveways near intersections can create major operational and safety problems. A driveway too close to the corner may conflict with queues, turning vehicles, pedestrians, bicycle lanes, and signal operations.
Common access problems
- Queues block driveways and force unexpected maneuvers.
- Driveway turning vehicles conflict with intersection turning movements.
- Closely spaced driveways create short weaving and decision zones.
- Left turns into or out of driveways add conflict near the main intersection.
- Pedestrians must cross multiple uncontrolled driveway openings.
Common access management tools
Designers may use driveway consolidation, shared access, median restrictions, right-in/right-out driveways, cross-access between parcels, service roads, turn restrictions, or relocation of driveways outside the functional intersection area.
Do not only review the intersection box. Review the entire functional area where queues, lane changes, driveways, transit stops, and pedestrian routes interact.
Drainage, Grading, and Constructability
Intersection grading is often one of the hardest parts of final design. The intersection must drain while also meeting pedestrian accessibility, matching existing pavement, and avoiding awkward curb ramp slopes.
Drainage issues to check
- Ponding in crosswalks or curb ramp landings
- Gutter flow crossing pedestrian paths
- Inlets placed where ramps, crosswalks, or bike lanes need to go
- Low points that create icing or maintenance issues
- Utility covers in ramps, crosswalks, or wheel paths
Constructability issues to check
A design should be buildable in stages while maintaining traffic, pedestrian access, drainage, and utility service. Designers should coordinate temporary traffic control, signal staging, pavement tie-ins, curb ramp reconstruction, utility relocations, and access to nearby properties.
Example: Improving a Four-Leg Signalized Intersection
Consider a suburban four-leg signalized intersection where the main street carries heavy through traffic and the side street has high left-turn demand during the evening peak. Pedestrians cross the main street to reach a bus stop and a retail center. Crash history shows rear-end crashes on the main street and several left-turn angle crashes.
Existing problems
- Left-turn queues exceed the existing bay and block through traffic.
- Permissive left turns are difficult because opposing through volumes are high.
- Pedestrian crossings are long because of wide approaches and large curb radii.
- Right-turning vehicles enter quickly and do not consistently yield to pedestrians.
- Driveways near the intersection create extra turning conflicts.
Potential improvements
- Lengthen or reconfigure the left-turn storage bay.
- Evaluate protected or protected-permissive left-turn phasing.
- Add high-visibility crosswalks and review pedestrian timing.
- Tighten curb radii where the design vehicle allows.
- Add pedestrian refuge if crossing distance remains long.
- Improve lighting and lane assignment signs.
- Review driveway spacing and consider access restrictions near the corner.
Why this is better
The improvements target the actual problems: storage length addresses rear-end and blockage issues, left-turn phasing addresses angle conflicts, tighter turning geometry improves pedestrian safety, and access management reduces extra conflict points near the intersection.
Common Intersection Design Mistakes
Designing only for cars
A vehicle-only design may miss pedestrian crossings, ADA paths, bicycle movements, transit access, and truck turning requirements. Intersections must work as multimodal spaces.
Oversizing the intersection
Wider is not always safer. Oversized intersections can increase crossing distances, turning speeds, pavement area, signal cycle length, and user confusion.
Ignoring actual speeds
Posted speed does not always match operating speed. A design should consider the speed environment users actually experience.
Forgetting queue spillback
Queue spillback can cause an intersection to fail even if the isolated capacity result looks acceptable. Storage and upstream impacts must be checked.
Adding turn lanes without checking pedestrian impacts
Turn lanes can improve vehicle operations but may lengthen crossings or create new pedestrian and bicycle conflicts if not designed carefully.
Treating signal timing as separate from geometry
Signal timing, stop bars, crosswalks, detection zones, poles, and lane geometry all affect each other. They should be coordinated early.
Plans, Exhibits, and Final Deliverables
A complete intersection design ends with drawings and documentation that can be reviewed, approved, built, and maintained. The final package should clearly communicate geometry, control, accessibility, operations, and construction staging.
Typical plan sheets
- Overall intersection layout: lane configuration, curb lines, medians, islands, crosswalks, and key dimensions.
- Plan and profile sheets: vertical geometry, curb grades, pavement tie-ins, and drainage coordination.
- ADA detail sheets: curb ramps, landings, detectable warnings, cross slopes, and accessible pedestrian routes.
- Signing and pavement marking sheets: lane assignment, arrows, crosswalks, stop bars, yield lines, and signs.
- Signal sheets: pole locations, heads, pushbuttons, detection, phasing notes, conduits, and cabinet locations.
- Traffic control/staging sheets: construction phasing, temporary markings, temporary signals, detours, and pedestrian access during construction.
Design narrative
A design narrative should explain the major assumptions and decisions: traffic data, design year, design vehicle, control selection, lane configuration, queue storage, sight distance, ADA approach, safety concerns, and any deviations from local standards.
Keep a decision log while designing. It becomes the backbone of your final narrative and helps answer review comments quickly.
Relevant Standards and Design References
Intersection design is guided by national references, state DOT manuals, local agency standards, and project-specific requirements. Always confirm the governing manuals for your jurisdiction before applying dimensions or warrants.
- Highway Capacity Manual (HCM): Common source for operational analysis methods, including capacity, delay, and level of service concepts.
- Manual on Uniform Traffic Control Devices (MUTCD): National guidance for traffic signs, pavement markings, signals, pedestrian devices, and temporary traffic control.
- AASHTO Green Book: Geometric design guidance for sight distance, alignment, cross sections, design vehicles, and roadway design fundamentals.
- FHWA intersection safety resources: Safety-focused guidance and countermeasure information for signalized and unsignalized intersections.
- State DOT and local agency manuals: Required dimensions, ADA details, signal equipment standards, pavement marking conventions, and design approval procedures.
Frequently Asked Questions
The first step is to define the context and collect the key inputs: base mapping, existing geometry, turning movement counts, speed environment, crash history, pedestrian and bicycle activity, design vehicle needs, right-of-way limits, utilities, and drainage constraints.
The most important elements include control type, lane configuration, sight distance, curb radii, turn lanes, pedestrian crossings, ADA ramps, bicycle treatments, signal phasing if applicable, signing, markings, drainage, and queue storage.
Engineers compare safety, operations, right-of-way, speeds, traffic volumes, pedestrian and bicycle needs, truck turning paths, construction impacts, maintenance, and user expectancy. A signal may be better for coordinated corridors and heavy directional demand, while a roundabout may be better where speed reduction and severe conflict reduction are priorities.
Dedicated turn lanes may be needed when turning vehicles create delay, rear-end crash risk, queue spillback, or lane assignment confusion. Designers should check turn volumes, through volumes, speeds, crash history, storage length, and downstream effects.
Sight distance gives users enough time to see conflicts, judge gaps, stop, turn, cross, or yield safely. Poor sight distance can make an otherwise reasonable intersection unsafe, especially at stop-controlled approaches, driveways, skewed intersections, and higher-speed roads.
Common mistakes include oversizing curb radii, ignoring pedestrians and ADA routes, failing to check queue storage, choosing control before understanding crash patterns, missing utility or drainage conflicts, and treating signal timing as separate from geometric design.
Summary and Next Steps
Intersection design is a structured process for managing conflicts where transportation paths meet. The strongest designs begin with context and data, select a control type that fits the problem, shape the geometry around safe speeds and clear movement paths, provide accessible pedestrian and bicycle routes, check operations and queue storage, and document the design in a buildable plan set.
If you are learning intersection design, focus on the relationship between geometry and behavior. Curb radii affect turning speeds. Lane configuration affects queues. Stop bars affect visibility and truck paths. Crosswalk placement affects pedestrian compliance. Signal timing affects both delay and safety. The best designs are not just technically correct; they are clear, predictable, and forgiving for real users.
Where to go next
Continue your learning path with these related Transportation Engineering topics.
-
Traffic Flow Theory
Build intuition for demand, capacity, speed, density, congestion, and queue formation.
-
Traffic Control Devices
Learn how signs, signals, markings, and control methods communicate right-of-way to users.
-
Highway Design
Understand the roadway design context that influences intersection geometry, access, and operations.
-
Traffic Engineering
Connect intersection design to broader traffic operations, safety analysis, and corridor performance.
Work with real numbers
Engineering calculators & equation hub
Jump from theory to practice with interactive calculators and equation summaries covering civil, mechanical, electrical, and transportation topics.