Key Takeaways
- Definition: Structural inspections evaluate the condition and performance of load-resisting elements such as beams, columns, walls, slabs, connections, and foundations.
- Use case: They are used when cracks, deflection, corrosion, settlement, fire damage, water damage, impact, or modifications may affect structural safety.
- Main decision: The key judgment is whether an observed condition is cosmetic, serviceability-related, durability-related, or a potential life-safety concern.
- Outcome: A good inspection turns field observations into prioritized findings, monitoring needs, repair recommendations, or deeper engineering evaluation.
Table of Contents
Introduction
In brief: Structural inspections evaluate visible load paths, distress, deterioration, movement, and damage to judge whether a structure needs monitoring, repair, or analysis.
Who it’s for: Students, owners, and reviewers.
For informational purposes only. See Terms and Conditions.
A structural inspection is not just a search for cracks. It is a disciplined process for connecting visible field evidence to structural behavior, risk, durability, and next-step engineering decisions.
Structural inspections infographic
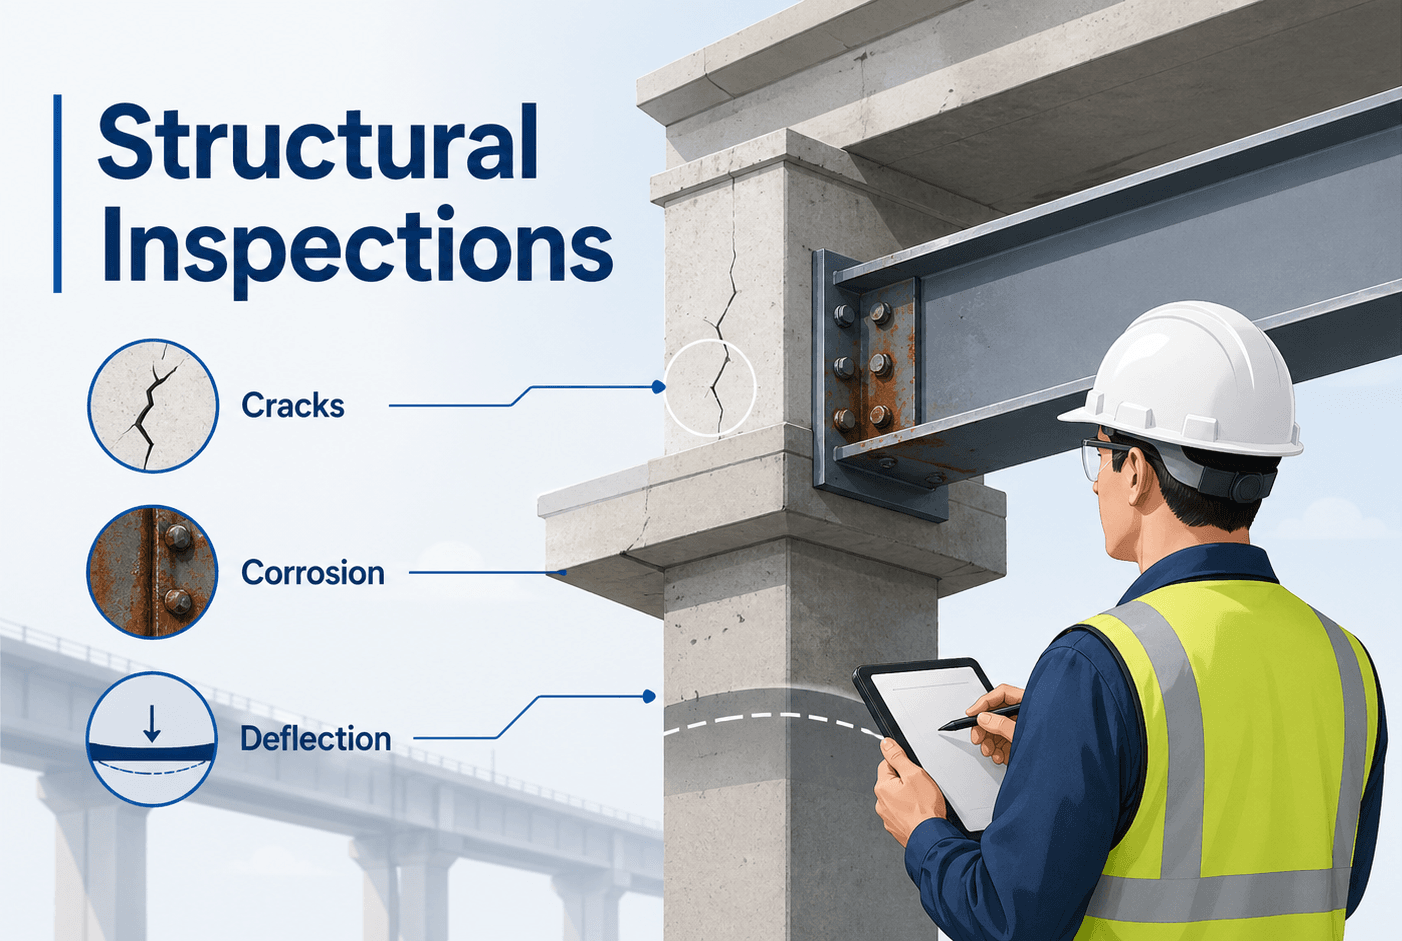
Notice first that inspection findings are not isolated observations. A crack, stain, displaced bearing, corroded connection, or settled support matters because it may reveal a change in load path, stiffness, durability, or serviceability.
What is a structural inspection?
A structural inspection is a focused evaluation of the parts of a structure that carry load, provide stability, resist movement, and support safe use. In a building, this may include framing, slabs, beams, columns, walls, bracing, diaphragms, connections, foundations, retaining elements, balconies, stairs, canopies, and roof structures. In infrastructure, it may include bridge decks, girders, bearings, piers, abutments, towers, tanks, supports, and anchorage systems.
The inspection goal is not simply to label an element as “good” or “bad.” A useful structural inspection asks what the observed condition means. Is the crack old and stable, or is it active and widening? Is corrosion only surface staining, or has it reduced section thickness? Is deflection expected for the span, or does it suggest overstress, creep, settlement, or missing support? These questions connect field conditions to structural analysis, load paths, materials, and performance limits.
Structural inspections are often triggered by visible distress, planned renovations, property transactions, storm damage, fire exposure, vehicle impact, water intrusion, vibration complaints, suspected foundation movement, code concerns, or routine maintenance programs. They also support long-term asset management by documenting how a structure changes over time.
A structural inspection becomes valuable when observations are tied to structural behavior: load path, support conditions, material condition, movement, durability, and risk.
Types of structural inspections
Different inspection types answer different questions. A quick visual review may be appropriate for screening obvious distress, while a forensic or condition assessment may require drawings, measurements, testing, monitoring, and calculations. Choosing the correct level of inspection prevents two common problems: overreacting to minor cosmetic issues or underreacting to warning signs that require deeper evaluation.
| Inspection type | Main purpose | Typical examples | Likely output |
|---|---|---|---|
| Visual structural inspection | Identify visible distress and obvious load path concerns | Cracks, deflection, corrosion, leaning walls, settlement signs | Findings summary and recommended next steps |
| Condition assessment | Evaluate the present condition of an existing structure or asset | Parking garages, bridges, façades, industrial structures, aging buildings | Condition ratings, repair priorities, maintenance plan |
| Damage assessment | Assess damage after an event | Fire, flood, storm, vehicle impact, overload, construction incident | Safety recommendations, stabilization needs, repair scope |
| Renovation or change-of-use review | Check whether existing framing can support new demands | New rooftop units, wall removal, heavier occupancy, openings in slabs | Required analysis, strengthening, or design coordination |
| Forensic investigation | Determine likely cause of distress or failure | Progressive cracking, settlement, connection failure, collapse investigation | Cause analysis, documentation, and technical opinion |
A structural inspection can be part of a larger engineering process. For example, an inspection may discover that a floor has excessive deflection, but the final answer may require measuring member sizes, verifying spans, estimating loads, reviewing drawings, checking material properties, and comparing demand against capacity. That deeper work belongs to engineering evaluation, not just visual observation.
Structural inspection workflow
A reliable inspection workflow moves from context to evidence to interpretation. The order matters. Field observations without background can be misleading, and drawings without field verification can miss what was actually built, modified, damaged, or deteriorated.
Start with the reason for inspection → review available drawings and history → identify the load-resisting system → observe distress patterns → document locations and severity → judge whether the issue is cosmetic, serviceability-related, durability-related, or safety-related → recommend monitoring, repair, testing, analysis, or immediate action.
1. Define the inspection question
The inspection should begin with a clear question. “Is this crack dangerous?” is different from “Can this building support a new rooftop unit?” or “Why is this wall moving?” A narrow question helps focus the field review, while a vague scope can miss the controlling issue.
2. Understand the structural system
Before judging distress, the inspector must understand how the structure is intended to carry load. A crack in a partition wall may be cosmetic, while a similar-looking crack in a shear wall, masonry bearing wall, transfer girder support, or foundation element may be more significant. This is why structural inspections are closely tied to load path analysis.
3. Document observations clearly
Good inspection documentation includes location, orientation, dimensions, severity, photographs, sketches, reference points, and context. A note that says “crack at wall” is weak. A stronger note states where the crack is, whether it is vertical, horizontal, diagonal, stepped, active-looking, associated with moisture, near an opening, or aligned with a beam, column, joint, or foundation transition.
4. Prioritize the findings
Not every finding has the same urgency. Some conditions can be monitored. Others require maintenance, repair, testing, temporary shoring, restricted access, or immediate engineering action. The inspection should help the owner or design team understand priority, not just produce a long list of observations.
What structural inspectors look for
Structural inspectors look for patterns that suggest a structure may not be behaving as intended. The individual sign matters, but the pattern matters more. A single hairline shrinkage crack may not be important. A series of diagonal cracks near openings, increasing floor slopes, sticking doors, foundation movement, and exterior masonry distress may point to a broader support or movement problem.
Common signs of structural distress
- Cracking: diagonal cracks, stepped masonry cracks, flexural cracks, shear cracks, map cracking, splitting, or widening joints.
- Deflection: sagging beams, uneven floors, excessive roof ponding, bowed walls, or serviceability complaints.
- Movement: settlement, rotation, lateral displacement, leaning columns, racked frames, or expanding joints.
- Deterioration: corrosion, spalling concrete, exposed reinforcement, wood decay, insect damage, moisture damage, or freeze-thaw distress.
- Connection problems: missing bolts, cracked welds, failed anchors, bearing distress, damaged plates, or inadequate support length.
- Load path interruptions: removed walls, cut framing, unbraced members, unapproved openings, or modifications that bypass intended support.
The inspector also looks for environmental causes. Water is one of the most common drivers of structural deterioration. Moisture can corrode steel, rot timber, expand masonry, damage concrete, soften some soils, and accelerate freeze-thaw cycles. Many structural problems that appear to be “material failures” are actually drainage, flashing, waterproofing, or maintenance failures that were allowed to affect the structure.
The most important clue is often not the largest crack. It is the relationship between distress, supports, loads, drainage, movement, and previous modifications.
How inspection findings are evaluated
Structural inspection findings are usually evaluated by severity, extent, activity, consequence, and uncertainty. A minor condition that is stable and isolated may only need monitoring or routine maintenance. A moderate condition in a critical element may require repair. A severe condition in a primary load path may require immediate action.
This is not a universal code equation. It is a practical way to think about inspection priority. Severity describes how bad the condition is. Extent describes how widespread it is. Consequence describes what could happen if it worsens. Uncertainty describes how much is unknown because of limited access, hidden construction, missing records, or unclear causes.
| Evaluation factor | Low concern example | Higher concern example | Why it matters |
|---|---|---|---|
| Severity | Small, stable finish crack | Wide diagonal crack in a load-bearing wall | Indicates possible structural demand or movement |
| Extent | One localized stain | Repeated corrosion across many connections | Widespread issues may reflect systemic deterioration |
| Activity | Old crack with no measurable change | Crack that continues widening | Active movement changes urgency |
| Consequence | Nonstructural finish issue | Damage at a transfer column or critical support | Critical elements need conservative judgment |
| Uncertainty | Open framing visible and documented | Hidden embedded steel with no drawings | Unknowns may require testing or investigation |
Inspection findings should also be compared with expected behavior. Reinforced concrete often cracks under service loads, but crack width, spacing, location, moisture exposure, and reinforcement corrosion risk influence concern. Wood framing can have checks and splits, but decay, notching, overboring, crushing, and connection withdrawal may be more serious. Steel may have surface rust, but section loss, pack rust, fatigue cracking, and connection damage change the evaluation.
Engineering judgment and field reality
Structural inspections require judgment because existing structures rarely match clean textbook assumptions. Drawings may be missing. Renovations may have changed the load path. Materials may be concealed. Framing may have been cut for mechanical, electrical, or plumbing work. Drainage may have deteriorated over decades. Repairs may hide old distress without correcting the cause.
Experienced inspectors look for consistency between what they see and how the structure should behave. A simply supported beam should not show distress patterns that suggest unintended restraint unless there is a reason. A retaining wall should not lean, crack, and collect water without raising questions about soil pressure, drainage, backfill, and reinforcement. A roof with ponding water should not be evaluated only as a roofing issue if deflection is increasing.
Field judgment also means knowing when not to overstate certainty. A visual inspection cannot verify every embedded connection, hidden reinforcing bar, concealed weld, or buried foundation condition. The correct recommendation may be targeted testing, monitoring, exploratory openings, calculation checks, or review by a licensed structural engineer familiar with the structure type and jurisdiction.
Before recommending a repair, ask whether the repair addresses the cause of distress or only covers the symptom. Cosmetic patching rarely solves an active structural movement problem.
When this breaks down
Structural inspections break down when the visible evidence is incomplete, the inspection scope is too narrow, or the observed distress is interpreted without understanding the structural system. A walk-through can identify obvious concerns, but it may not reveal hidden corrosion, concealed rot, embedded reinforcement damage, foundation conditions, overstressed connections, or construction defects behind finishes.
A visual inspection also becomes unreliable when access is limited. Roof structures may be hidden above ceilings, connections may be covered by fireproofing, foundations may be buried, post-tensioning may be concealed, and façade anchors may be inaccessible without special equipment. In those cases, the inspection should state limitations clearly and recommend additional investigation when the risk justifies it.
Another breakdown occurs when inspection findings are separated from loading. A structure may look acceptable under normal use but lack capacity for a new occupancy, heavier equipment, rooftop solar, storage loading, façade changes, or altered framing. For load-related questions, inspection should be paired with review of structural loads and appropriate calculations.
Do not assume “no visible distress” means “adequate capacity.” Some serious structural deficiencies remain hidden until loading, deterioration, or an extreme event exposes them.
Common pitfalls and engineering checks
The best inspections are systematic. They avoid jumping to conclusions from one symptom, and they avoid treating all defects with the same urgency. The following checks help keep the inspection tied to structural behavior rather than surface appearance alone.
- Trace the load path: Identify how gravity and lateral loads move through the structure before judging a damaged element.
- Separate cosmetic from structural: Finish cracks may matter, but only when their pattern suggests movement, distortion, or support problems.
- Look for active change: New, widening, repeating, or moisture-associated distress is more concerning than stable isolated defects.
- Check critical elements first: Columns, transfer members, foundations, connections, bracing, diaphragms, and supports deserve special attention.
- Connect symptoms to causes: Cracking, corrosion, settlement, and deflection should be tied to likely mechanisms before repair decisions are made.
- State limitations: Hidden conditions, restricted access, missing drawings, and unknown materials should be documented rather than ignored.
| Observed condition | Possible structural concern | Common next step | Related topic |
|---|---|---|---|
| Diagonal wall cracking | Settlement, lateral movement, shear distress, or load redistribution | Measure pattern, review supports, monitor movement, evaluate foundation | Structural Failure |
| Corroded steel connection | Section loss, reduced bolt capacity, moisture-driven deterioration | Clean and measure, check section loss, improve drainage or coating | Steel Design |
| Spalled concrete with exposed rebar | Corrosion expansion, cover loss, durability concern, possible capacity loss | Determine depth, corrosion extent, repair strategy, exposure source | Concrete Design |
| Sagging floor or roof | Excessive deflection, creep, overload, damaged support, ponding risk | Survey elevations, check spans and loads, review serviceability | Structural Analysis |
| Removed wall or cut framing | Interrupted load path or unplanned load transfer | Review drawings, trace load path, design reinforcement if needed | Load Bearing Structures |
Visualizing structural inspection logic
A useful way to visualize structural inspection is as a chain from evidence to decision. The visible symptom is only the starting point. The inspector observes a condition, identifies the affected structural element, considers the load path, judges likely causes, evaluates severity and consequence, and then recommends a practical next step.
For example, a crack near a window opening may begin as a visual observation. The inspection then asks whether it is in a nonstructural finish, masonry veneer, load-bearing masonry, concrete wall, or adjacent frame. The answer changes the level of concern and the appropriate response.
This section is text-only to avoid duplicating the main instructional infographic above.
Relevant standards and design references
Structural inspection requirements depend on structure type, location, owner requirements, adopted codes, and project scope. The references below commonly support inspection decisions, condition assessment, repair design, and follow-up engineering evaluation.
- International Building Code (IBC): Establishes building code requirements, special inspection provisions, occupancy considerations, unsafe structure concepts, and references to structural design standards used by many jurisdictions.
- ASCE/SEI 7: Defines minimum design loads and load combinations for buildings and other structures. It becomes important when inspection findings relate to capacity, change of use, overload, wind, snow, seismic, flood, or other structural demands.
- ACI 562: Provides a framework for assessment, repair, and rehabilitation of existing concrete structures. It is especially relevant when inspections find cracking, spalling, corrosion, or strength concerns in concrete members.
- AISC 360 and AISC 341: Support evaluation of steel members, connections, stability, and seismic force-resisting systems when inspections reveal corrosion, deformation, damage, missing elements, or connection concerns.
- AWS D1.1: Applies to structural welding requirements and is commonly referenced when weld condition, weld cracking, field repairs, or steel connection inspection is part of the scope.
Real projects may also require local building department rules, bridge inspection manuals, façade ordinances, parking garage inspection rules, owner standards, insurance requirements, or material-specific repair guidelines.
Frequently asked questions
A structural inspection usually includes a review of visible load-resisting elements, signs of distress, deterioration, movement, moisture damage, foundation behavior, connections, and available drawings or maintenance history.
No. A home inspection is a broad condition review of many building systems, while a structural inspection focuses on the load-resisting system and conditions that may affect safety, stability, serviceability, or durability.
A structural inspection should be considered when cracks, settlement, deflection, corrosion, impact damage, fire damage, water intrusion, vibration, unauthorized modifications, or change of use may affect structural performance.
A visual inspection can identify visible concerns and guide decisions, but it cannot prove every hidden component is sound. Higher-risk findings may require testing, monitoring, calculations, or invasive investigation.
The next step depends on severity. The issue may be documented for monitoring, evaluated with calculations, repaired, stabilized temporarily, investigated with testing, or escalated for immediate safety action.
Summary and next steps
Structural inspections evaluate how an existing structure is performing in the real world. They connect visible conditions such as cracks, corrosion, deflection, settlement, moisture damage, and connection distress to the underlying load path and structural system.
The most important practical lesson is that inspection findings require context. A structural condition should be judged by severity, extent, activity, consequence, uncertainty, and its relationship to the load-resisting system. Some findings only need monitoring, while others require repair, testing, calculations, or immediate safety action.
A strong inspection process documents what is visible, states what is unknown, identifies likely causes, and recommends the next responsible step. That combination of field observation and engineering judgment is what makes inspections useful for owners, students, designers, and reviewers.
Where to go next
Continue your learning path with these related structural engineering topics.
-
Study structural failure
Learn how distress can progress into serviceability problems, instability, capacity loss, or collapse when causes are not addressed.
-
Review load path analysis
Understand the central inspection question: how loads move through members, connections, supports, foundations, and soil.
-
Explore structural safety systems
See how inspections, monitoring, redundancy, durability, and maintenance support long-term structural performance.